You’ve decided it’s time to upgrade to a smart thermostat, but there’s one problem: your home doesn’t have a C wire. Don’t worry, you’re not alone. Thousands of homeowners face this same challenge, especially in older homes with basic heating and cooling systems. The good news is that a missing C wire doesn’t mean you’re stuck with a manual thermostat. Modern technology has solved this problem with several practical alternatives. Whether your home lacks a common wire or you’d simply prefer not to run new wiring, smart thermostat options without a C wire are now more reliable and affordable than ever. This guide walks you through what a C wire actually does, which smart thermostat models work without one, and how to install them properly.
Table of Contents
ToggleKey Takeaways
- A smart thermostat without a C wire is achievable through battery-powered models or wireless hybrid solutions with power extender kits, eliminating the need for expensive rewiring in older homes.
- Battery-powered smart thermostats offer the simplest installation but typically require battery replacement every 1–2 years, making them ideal for homeowners seeking convenience over constant power.
- Power extender kits safely derive voltage from existing heating and cooling wires to maintain thermostat operation, though compatibility varies by HVAC system type and should be verified with manufacturer documentation.
- Always turn off your furnace breaker, photograph existing wiring, and connect wires according to color codes (R, W, Y, G) to avoid damage during installation.
- If your system lacks the minimum required wires (R for power, W for heat, Y for cooling), professional HVAC technician assistance is recommended to prevent equipment damage or safety hazards.
What Is a C Wire and Why Do Smart Thermostats Need It?
A C wire (or common wire) is the fifth wire in a standard home HVAC system. While your heating and cooling system uses wires to signal the furnace, air conditioner, and fan, the C wire provides a continuous path back to the transformer for power. Think of it as a return path in an electrical circuit.
Traditional “dumb” thermostats drew power directly from the HVAC system and used very little electricity. Smart thermostats, on the other hand, run WiFi chips, touchscreens, and constant processors, they demand consistent power. Without a C wire providing that steady 24-volt power, a smart thermostat would drain battery backups or function unreliably.
Here’s the catch: not every home has a C wire run from the furnace to the thermostat location. Many older or simpler systems only ran four wires, typically for heat (W), cooling (Y), fan (G), and one other wire. If your home was built before smart thermostats became common, or if your HVAC setup is basic, you likely won’t find a fifth wire in your thermostat wall plate.
The absence of a C wire doesn’t mean you can’t have a smart thermostat. It just means you’ll need to choose a model designed to work around this limitation, or consider running a fifth wire yourself (a job that’s doable for confident DIYers but often better left to HVAC professionals).
Smart Thermostat Options That Work Without a C Wire
The market for no C wire smart thermostat solutions has grown significantly. You have two main categories to consider: battery-powered models and wireless or hybrid systems that either generate their own power or use alternative methods.
Battery-Powered Models
Battery-powered smart thermostats are the simplest solution. They run on standard AA or AAA batteries (or rechargeable variants) and don’t require any new wiring from your HVAC system.
Battery models trade continuous power for convenience and simplicity. You install the thermostat, insert batteries, and connect it to your WiFi. These units are ideal if you want to avoid any electrical work. The main trade-off is battery life, most models last 1-2 years before needing replacement, though some last longer depending on usage and the thermostat’s power efficiency.
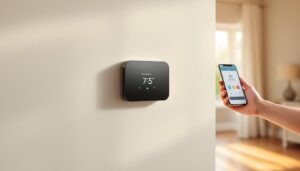
Popular battery-powered options include units that offer basic smart features: remote temperature control via smartphone app, scheduling, and integration with smart home systems. Many of these are specifically designed as no C wire smart thermostats, so manufacturers have optimized them for low power consumption.
When choosing a battery model, check the estimated battery life for your specific climate. Heating-heavy climates or systems that run frequently will drain batteries faster than occasional-use cooling-dominant setups.
Wireless and Hybrid Solutions
Wireless and hybrid smart thermostats use more sophisticated power-management tricks. Some models include a power extender kit (also called a C-wire bridge), which taps into your existing wiring in a clever way to generate the small amount of power needed without requiring a true C wire installation.
These kits work by carefully measuring voltage across two existing wires (like the heating and cooling wires) and deriving just enough power to keep the thermostat running. It’s not a permanent electrical solution in the traditional sense, but it’s safe and effective when installed correctly. The best smart thermostat without a C wire in this category often includes such a kit in the box.
Other hybrid models use a combination approach: they run partially on batteries and partially on power derived from the HVAC system, extending battery life significantly. Some also include WiFi boosters or companion hardware to strengthen connectivity, which matters because a thermostat without a hardwired power source sometimes sits farther from the router.
When evaluating wireless and hybrid options, research the specific thermostat model’s compatibility with your HVAC system. Not all power extender solutions work with heat pumps, electric resistance heating, or certain furnace types. Check manufacturer documentation carefully, and don’t hesitate to contact their support team with details about your system.
Installation Tips for C-Wire-Free Smart Thermostats
Installing a no C wire smart thermostat is far simpler than running new wiring, but a few practical steps ensure success.
Before you start:
- Turn off your HVAC system at the breaker. This is non-negotiable. Working on live electrical circuits, even low-voltage ones, can damage equipment or cause injury.
- Take a photo of your existing thermostat wiring before disconnecting anything. This becomes your reference if you need to troubleshoot later or revert changes.
- Write down which wire connects to which terminal (typically labeled W, Y, G, R). Don’t rely on memory.
- Check your new smart thermostat’s requirements. Some units need specific wire configurations. For example, certain best smart thermostat without a C wire models require the fan wire (G) in a certain position.
Installation process:
Most battery-powered or wireless units follow these steps:
- Remove the old thermostat by gently disconnecting the wires from their terminals. Loosening the set screws and pulling wires straight out prevents accidental damage.
- Turn off the breaker controlling your furnace (usually labeled “Heating” or “HVAC” on your home’s electrical panel).
- Prepare the new thermostat mounting plate. Use a level to ensure it’s straight, especially if your wall isn’t perfectly plumb. Mark screw holes and drill pilot holes if needed, don’t crack drywall with over-torquing screws.
- Connect the wires to the new thermostat according to its manual. R (power/red) typically goes to one terminal, W (heat/white) and Y (cool/yellow) and G (fan/green) to their respective spots. Don’t force wires into terminals: they should slide in smoothly.
- Secure the thermostat faceplate and power it up. If using batteries, install them now. If the unit includes a power extender kit, follow the manufacturer’s instructions carefully, these kits vary by model.
- Restore power to your furnace and turn the system back on. Let it run briefly (heating or cooling) to confirm the thermostat responds correctly.
- Connect to WiFi via the thermostat’s app or built-in interface. Download the manufacturer’s app and log in with your account. Most smart thermostats will walk you through this step.
Common pitfalls:
- Not isolating the old thermostat wire beforehand. If you’re switching systems in an older home, disconnected wires might get mixed up. Tape or label them.
- Assuming your system uses all four standard wires. Some units only run three. A smart thermostat won’t function on incomplete wiring, it needs at least R (power), W (heat), and Y (cooling). If your system only has two wires, you’ll need to investigate further or call a technician.
- Forgetting battery backup. If your thermostat uses batteries as primary power, keep spares on hand. A dead battery means no heating or cooling control, very inconvenient in winter or summer.
- Not confirming WiFi signal strength. Smart thermostats work best with solid WiFi. If your thermostat sits in a dead zone, consider a WiFi extender or moving your router.
If you’re uncomfortable working with electrical components, even low-voltage systems, call a licensed HVAC technician. It’s cheaper than repairing a damaged furnace or accidentally triggering a safety switch. Many technicians charge $100–$200 to swap a thermostat, which is reasonable insurance against mistakes.
Conclusion
A missing C wire isn’t a showstopper for upgrading to a smart thermostat. Battery-powered models and wireless solutions with power extender kits provide reliable alternatives that avoid the cost and complexity of running new wiring. Research your HVAC system’s compatibility, follow installation steps carefully, and don’t skip the safety basics. With the right preparation, you’ll have remote temperature control and scheduling benefits in an afternoon, and you’ll still have electricity running through your home safely.