If you’re tired of walking across your house to adjust the temperature or coming home to a freezing living room, the RTH9580 WiFi smart thermostat offers a straightforward answer. This guide walks you through setup, mobile control, and scheduling to help you make the most of your investment. Whether you’re upgrading from a basic programmable model or installing your first smart thermostat, you’ll find practical steps that don’t require an HVAC degree to understand.
Table of Contents
ToggleKey Takeaways
- The RTH9580 WiFi smart thermostat enables remote temperature control and automation that can deliver 10–15% energy savings through better scheduling and adaptive learning.
- Proper installation requires a C (common) wire connection and careful wire labeling from your old thermostat; a loose C wire is the most common culprit preventing reliable operation.
- Optimized schedules combining weekday/weekend adjustments and nighttime temperature drops generate maximum efficiency—most homeowners find their ideal settings within 2–3 months.
- WiFi connectivity is critical to the thermostat’s value; position your router centrally and keep it away from metal appliances to maintain strong signal strength for remote control and scheduling benefits.
- Enable geofencing as a backup automation to adjust temperatures based on household location, though GPS accuracy varies in rural or densely built areas.
- Seasonal switching between heating and cooling modes prevents system conflicts and energy waste, while energy reports help identify additional cost-reduction opportunities without sacrificing comfort.
What Is the RTH9580 and Why It Matters for Your Home
The RTH9580 is a WiFi-enabled smart thermostat designed to give you remote temperature control and automation features that can reduce heating and cooling costs. Unlike older programmable models that require manual adjustment or stick to a fixed schedule, this thermostat learns your patterns and lets you adjust settings from your phone, whether you’re at work, on vacation, or in another room.
The RTH9580WF variant includes built-in WiFi, eliminating the need for a separate hub. It’s compatible with most standard HVAC systems (heating, cooling, and heat pump setups) and works with major smart home platforms. Recent smart thermostat tests show models like this one can deliver 10–15% energy savings through better scheduling and remote adjustments.
Key Features That Set It Apart
Remote access via mobile app lets you adjust temperature from anywhere with an internet connection. This is especially useful if you leave the house and forget to lower the heat, or want the place warm before you arrive home.
Programmable schedules let you set different temperatures for weekdays, weekends, and specific times. You can create a schedule that drops temperature at night and raises it before you wake, automatically, without touching the wall unit.
Adaptive recovery learns how long your HVAC system takes to reach a target temperature and adjusts start times accordingly. This prevents overshooting and wastes less energy.
Geofencing can trigger automatic temperature changes when you leave or arrive home, based on your phone’s location. It’s convenient, though accuracy depends on your local GPS signal strength.
Energy reports show your heating and cooling patterns over weeks or months, helping you identify opportunities to reduce usage without sacrificing comfort.
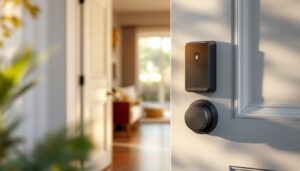
Installation: Getting Your Smart Thermostat Up and Running
Before you start, turn off power to your HVAC system at the breaker. Take a photo of your old thermostat’s wiring setup, different systems use different combinations of wires, and you’ll need to match them correctly to the RTH9580.
What you’ll need:
- RTH9580 thermostat unit and mounting plate
- Wire labels or tape (to mark your existing wires)
- A flat-head screwdriver
- Optional: a battery (AA) for temporary power if you’re between thermostats
- Wire nuts (if rewiring is necessary: usually they come with the unit)
Step-by-step installation:
- Remove power at the breaker. Never work on live electrical wiring.
- Carefully pull off your old thermostat’s faceplate and label each wire with masking tape before disconnecting (common terminals are R, W, Y, G, C for 24V control lines).
- Unscrew and remove the mounting plate from the wall.
- Install the RTH9580’s mounting plate, ensuring it’s level. Use the provided wall anchors if you’re not drilling into a stud.
- Connect wires to the RTH9580’s terminal block according to your system type, the manual includes a wiring diagram for furnaces, air conditioners, and heat pumps.
- Screw the thermostat body onto the mounting plate.
- Restore power and press the power button on the RTH9580 to begin setup.
If your existing thermostat didn’t have a “C” (common) wire and you don’t have one running to your HVAC unit, you may need to run a new wire or use a power adapter. Alternatively, the RTH9580 can run on batteries temporarily, but WiFi and continuous operation require a hardwired C wire. This is a job for a licensed electrician if you’re not confident pulling wire through walls.
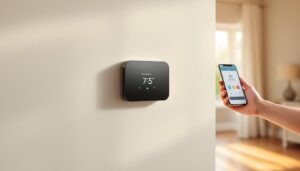
WiFi Connectivity and Mobile Control Essentials
Once the thermostat is installed and powered, the setup process guides you through connecting to your home WiFi network. Open the RTH9580’s setup menu on the display screen and select your WiFi network from the list. Enter your WiFi password carefully, a single typo will prevent connection.
Download the official companion app from your phone’s app store and create an account. Log in, add the thermostat by entering its serial number or scanning a QR code, and follow the prompts to assign it to a room or location (e.g., “Living Room”).
Mobile control features:
- Instant temperature adjustment: Change the setpoint by 1-2°F from anywhere.
- Trip mode: Set a hold temperature for vacation or extended absence.
- Alerts: Receive notifications if the thermostat detects unusual activity or loses WiFi connection.
- Usage insights: View heating and cooling runtime, peak times, and seasonal trends.
For best WiFi performance, position your router in a central location and keep it away from metal appliances. If the thermostat is more than two rooms away from your router, signal strength may drop. Moving the router or adding a mesh WiFi system can help. According to recent smart home tech reviews, WiFi connectivity is critical to the thermostat’s value, if your home network is unstable, you’ll lose remote control and scheduling benefits.
Creating Schedules and Automations for Maximum Efficiency
The real energy savings come from consistent, optimized schedules. Open the app and create a heating schedule (or cooling, depending on the season). Most households benefit from these baseline settings:
- Weekday morning (6–8 AM): Target 70°F to ensure comfort before work or school.
- Weekday daytime (8 AM–5 PM): Lower to 68°F or even 66°F if no one’s home.
- Weekday evening (5–10 PM): Raise to 70–72°F when everyone’s home.
- Nighttime (10 PM–6 AM): Drop to 66–68°F to reduce heating costs while you sleep (most people sleep better in cooler rooms).
- Weekend: Adjust based on your typical weekend routine, you may stay home longer, so comfort may take priority over savings.
Once you’ve created a basic schedule, the thermostat will follow it automatically unless you override it manually. Overrides stick until the next scheduled change, so if you lower the temperature to 65°F on a Tuesday evening, it’ll stay there until your Wednesday morning schedule kicks in.
Using geofencing: If you enable location-based automation, the thermostat can drop temperature when all household members leave and raise it when the first person arrives home. This requires WiFi and location permission in the app. Note that GPS accuracy varies in rural or densely built areas, so geofencing works best as a backup automation, not your primary control method.
Seasonal adjustments: Switch heating schedules to cooling schedules when you turn off the furnace for summer. Leaving both active can cause the system to fight itself and waste energy. Most RTH9580 units make this a one-tap seasonal switch in the app.
Troubleshooting Common Issues and Optimizing Performance
WiFi disconnects frequently: Check signal strength in your thermostat’s settings menu (usually displayed as dBm). Signals weaker than –75 dBm are unreliable. Move your router closer or reposition it away from metal cabinets and cordless phone bases, which interfere with 2.4GHz WiFi. If your router supports dual-band, connect the thermostat to the 2.4GHz band (not 5GHz, which doesn’t travel as far).
Thermostat won’t accept the C wire: If you rewired and the unit still won’t power on, double-check that you’re using the correct wire gauge (usually 18–22 AWG for control wiring). Make sure the connection is tight and there’s no corrosion at the terminal. A loose C wire is the most common culprit.
Heating or cooling won’t turn on: Confirm the thermostat’s mode is set to “Heat,” “Cool,” or “Auto”, not “Off.” Check that the breaker for your HVAC system is still on. If the thermostat is displaying an error code, consult the manual for that specific code.
Schedules aren’t working: Confirm the app is synced (check the timestamp in your settings). If the thermostat has been reset or lost power, your schedules may be wiped and reverted to factory defaults. Recreate them in the app and double-check that the thermostat’s internal clock is set to your correct time zone.
Accuracy concerns: The RTH9580 has a temperature sensor built into the unit. If you feel the reading is off by a few degrees compared to a wall-mounted thermometer, this is often because the thermostat is on an interior wall and senses radiant heat from the sun or drafts from a door. For best accuracy, avoid placing it near a window, exterior wall, or heating vent. Product reviews from Tom’s Guide highlight that sensor placement is as important as the thermostat’s software.
Conclusion
The RTH9580 WiFi smart thermostat is a practical upgrade that pays for itself through energy savings and convenience. Proper installation, especially ensuring a solid C wire connection, is the foundation of reliable performance. Combine that with thoughtful scheduling and mobile access, and you’ll see measurable reductions in heating and cooling costs without sacrificing comfort. Start with a basic schedule, monitor your energy reports, and adjust as your household patterns become clearer. Most homeowners find their sweet spot within 2–3 months and enjoy both lower bills and the peace of mind that comes with remote control.